Mini-Project: The Maze Game
- Design a custom maze backdrop with clear paths and boundary colors.
- Program responsive keyboard controls for the player sprite.
- Apply conditionals and sensing to block movement through maze walls.
- Ensure reliable loop execution so the game constantly checks for win/loss conditions.
1. Design custom maze backdrops and paths
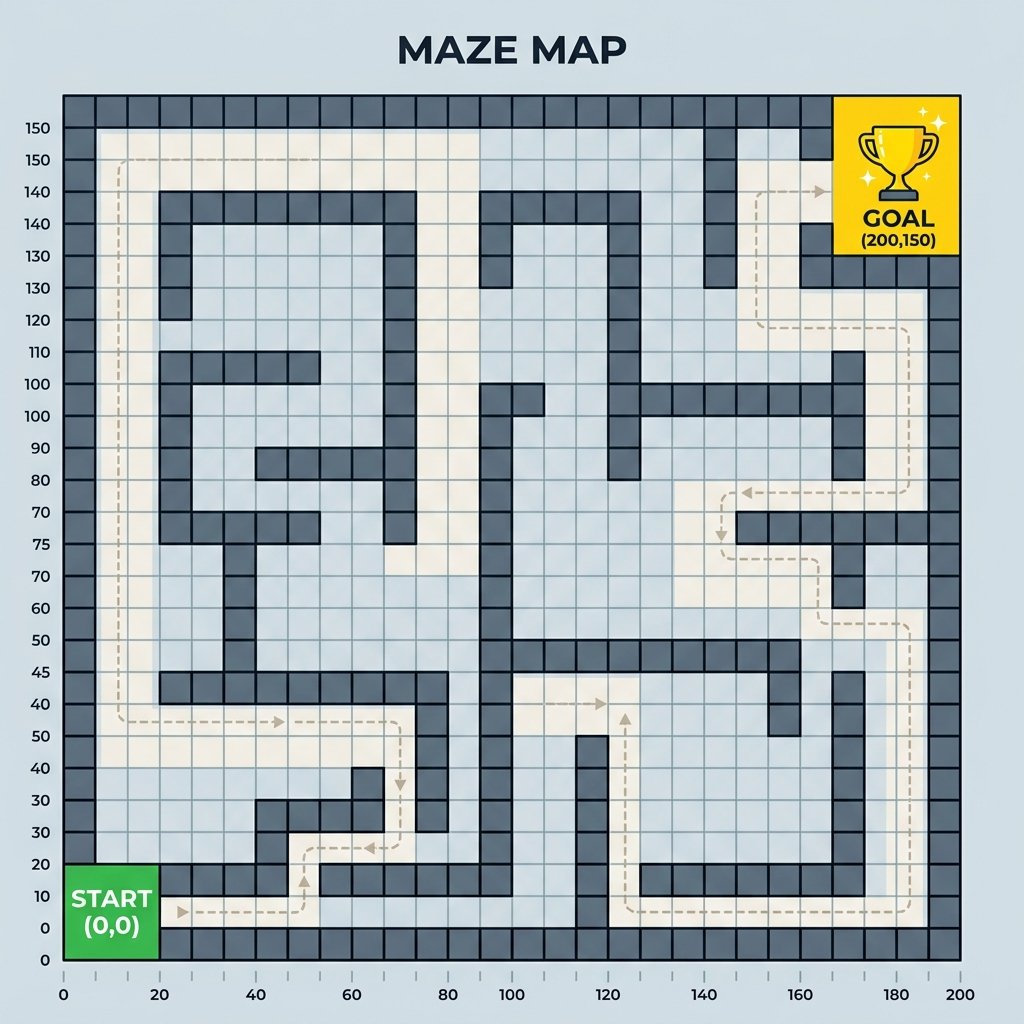
Creating a maze game begins with designing the stage. The backdrop should feature a clear pathway and solid-colored walls (like black). The walls must be thick enough to prevent the player sprite from slipping through, and the path must be wide enough to allow the sprite to navigate easily. This sets up clear visual boundaries for our collision-sensing scripts.
Design planning ensures playability. If the path is narrower than the player sprite's hit box, the sprite will get permanently stuck. Scaling the player sprite down or drawing wider corridors prevents navigation issues.
2. Program responsive keyboard controls
For smooth player movement, you place conditional keypress checks inside a
forever loop rather than using separate event blocks. A script that
constantly checks if key [right arrow] pressed? then change x by 4 runs
much faster and smoother than using individual event triggers, providing responsive and
precise controls.
This method prevents input lag. Separate keypress event blocks cause a slight pause before repeating movement. Nesting key sensors inside a forever loop eliminates this delay, giving the player instant control response.
3. Block movement through maze walls (Undo Step)
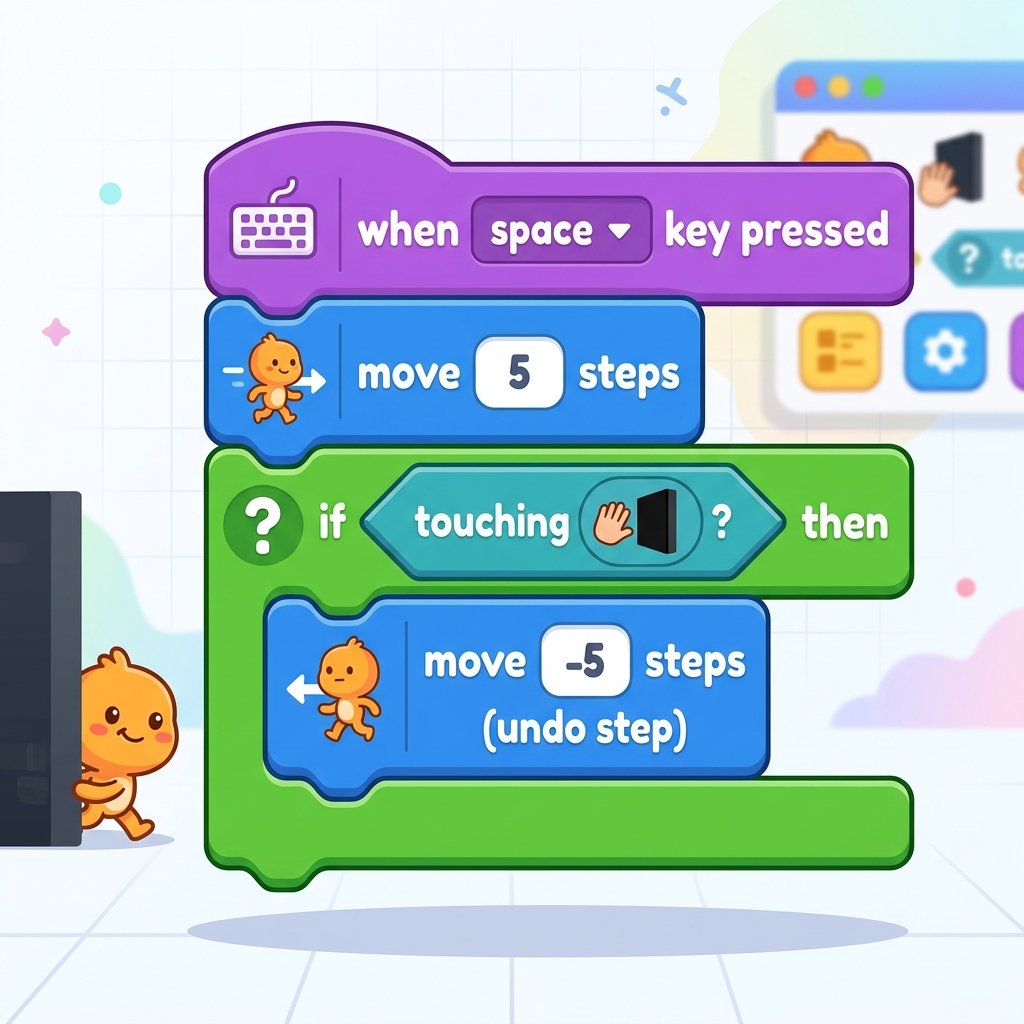
To prevent the player from walking through walls, you use a motion reset trick: when a movement key is pressed, the sprite moves forward. The script immediately checks if the sprite is touching the wall color. If it is, the sprite takes a step backward (e.g., moving -4 steps), undoing the movement before it can be drawn on screen. This blocks the sprite from passing through the walls.
This undo-step logic mimics physical solidity. By calculating and resolving the collision in a single frame, the player never sees the sprite overlap the wall, creating a clean boundary effect.
4. Coordinate loops for win/loss conditions
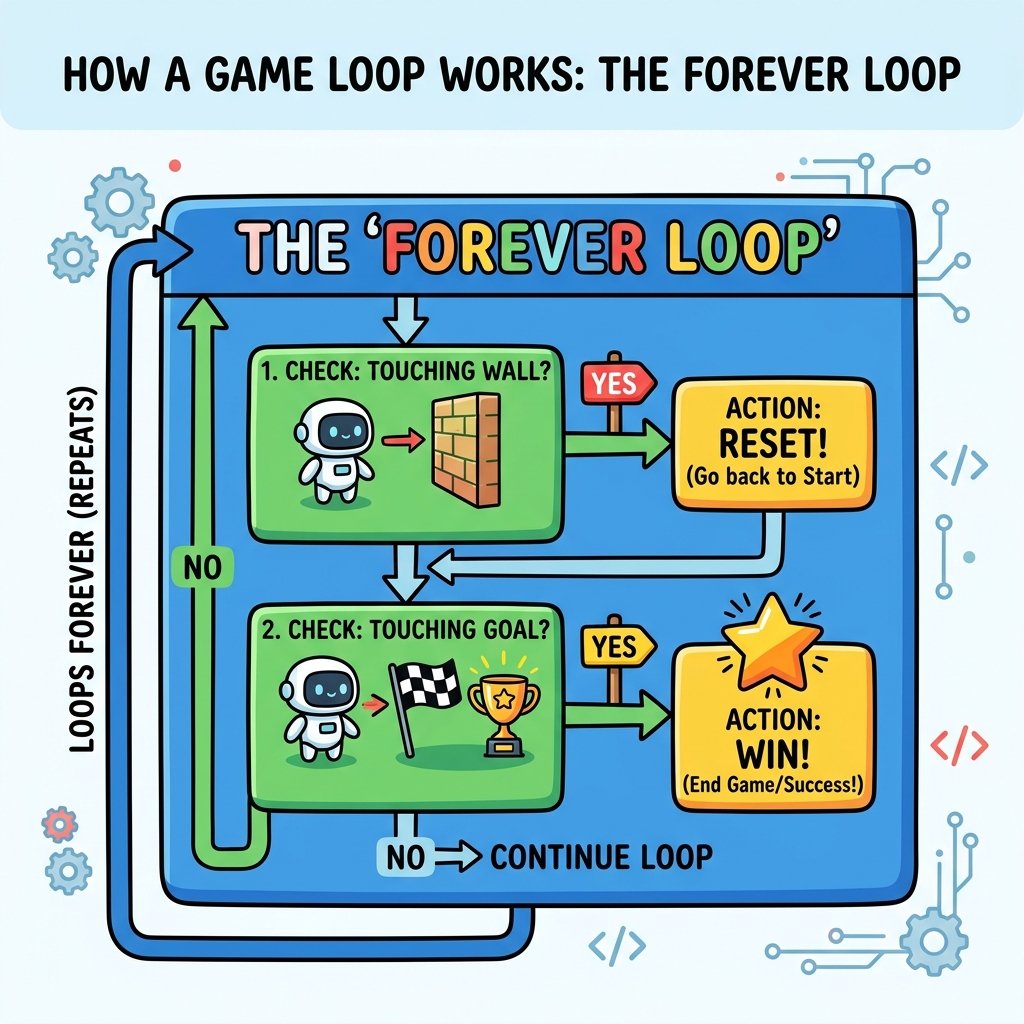
A maze game needs to constantly monitor the player's status. By using a central
forever loop, the program continuously checks two conditions in the
background: if the sprite touches the wall color, it resets or blocks movement; if it
touches the goal sprite, it triggers a win screen, stopping all scripts.
Centralizing checks guarantees game state integrity. If win/loss checks are placed inside separate scripts, timing lags might let the player touch the wall and win simultaneously. Running them in a single forever loop ensures accurate checks.
Build a Maze Runner Game
- Select the 'Ball' sprite as the player. Set its size to 50%. Choose or paint a backdrop with simple black maze walls and a yellow goal square at the end.
- Create a startup script: when green flag clicked, go to x: -200, y: 140 (the maze entrance).
- Add a 'forever' loop. Inside, program controls for arrow keys: Up Arrow (change Y by 4), Down Arrow (change Y by -4), Right Arrow (change X by 4), and Left Arrow (change X by -4).
- Inside each arrow key check, directly below the coordinate change, add a check: if touching color (black), undo the move (change coordinate by the opposite value).
- At the end of the forever loop, add a check: if touching color (yellow), say 'You Escaped!' for 2 seconds, and stop all scripts.
Model Answer Walkthrough
- Set the start position: [when green flag clicked] -> [go to x: (-200) y: (140)].
- Create the control loop: [forever] (Control Category).
- Program the Right Arrow block: [if
then] -> [change x by (4)] -> [if then] -> [change x by (-4)] (Motion Category). - Program the Left Arrow block: [if
then] -> [change x by (-4)] -> [if then] -> [change x by (4)] (Motion Category). - Program the Up Arrow block: [if
then] -> [change y by (4)] -> [if then] -> [change y by (-4)] (Motion Category). - Program the Down Arrow block: [if
then] -> [change y by (-4)] -> [if then] -> [change y by (4)] (Motion Category). - Add the goal check at the end of the loop: [if
then] -> [say (You Escaped!) for (2) secs] -> [stop (all)] (Control Category).